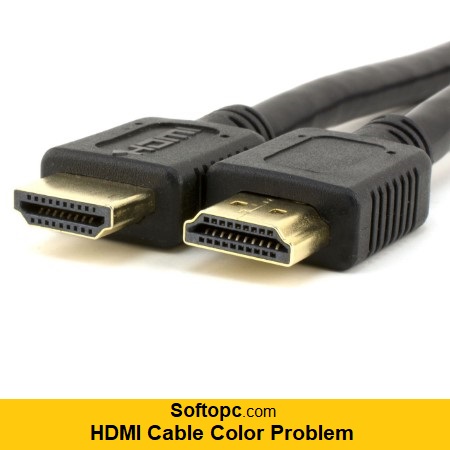
Solve your HDMI cable color problem with these quick fixes. Learn how to troubleshoot and resolve common issues on our blog.
Are you experiencing color issues with your HDMI cable? The problem might not be with the device, but the cable itself. HDMI cables are known to have color problems due to a variety of reasons such as damaged cables or incorrect connections.
In this blog post, we will discuss the common color issues that occur with HDMI cables and how you can fix them. We will also cover the importance of securely plugging in HDMI cables and recognizing damage in them. Furthermore, we will explain how different HDMI ports may affect color and what role RGB settings play in HDMI color quality. Read on to learn quick fixes that you need to know to resolve your HDMI cable color problems and enjoy an uninterrupted viewing experience.
Understanding HDMI Cable Color Problems
Different colors on the screen may indicate an issue with your HDMI cable connection. HDMI cables transmit audio and video signals digitally, so color problems can be a sign of data transmission issues. Color problems can occur due to incorrect color space settings or a faulty HDMI cable. Troubleshooting color problems requires checking the cable connections and adjusting display settings. HDMI cable color problems can often be resolved with simple fixes.
Common Issues with HDMI Cable Colors
HDMI cable-related issues can indeed lead to incorrect color output on a display. Here’s a bit more detail on each of the factors:
- Mismatched Color Settings: Sometimes, the color settings on the source device (e.g., a computer or gaming console) and the monitor or TV may not be properly configured. This can result in color discrepancies or inaccurate representation of colors.
- Faulty HDMI Cable: A faulty HDMI cable can cause various issues, including color artifacts, loss of color, or even a complete loss of signal. Damaged or low-quality cables may not transmit the data correctly, leading to color problems.
- Loose or Damaged HDMI Connectors: Loose or damaged connectors on the HDMI cable or the HDMI ports of the devices can disrupt the signal transmission. This can result in poor color quality or the complete loss of color.
- Poor Quality HDMI Cables: Low-quality HDMI cables may not be capable of supporting high-resolution or high-refresh-rate displays, which can lead to color issues, flickering, or signal dropouts.
- HDCP (High-bandwidth Digital Content Protection) or EDID (Extended Display Identification Data) Issues: HDCP is a copy protection technology, and EDID provides information about the capabilities of the display. Problems with HDCP or EDID communication between devices can cause color problems, as the devices may not properly negotiate the correct settings.
Importance of Securely Plugging HDMI Cables
Properly plugging in HDMI cables ensures a secure and reliable connection, minimizing the chances of data loss and color artifacts. Loose connections can lead to intermittent signal loss and color problems. It is important to insert the HDMI cable into the correct HDMI port on both the source device and the monitor or TV and verify that it is fully inserted and securely connected.
Ensuring the Right Connection Between the Source Device and the Monitor/TV
To ensure the right connection between your source device and monitor/TV;
- Use the Appropriate HDMI Input: Most monitors and TVs have multiple HDMI ports. It’s important to use the correct HDMI input on your display that corresponds to the source device you’re connecting. This ensures that the signal reaches the right input.
- Configure Source Device Output: Ensure that your source device (e.g., a computer, Blu-ray player, gaming console) is set to output video and audio through HDMI. This configuration may require adjustments in the device’s settings.
- Select the Correct HDMI Port: On your source device, select the correct HDMI port or channel that corresponds to the one you’ve used on your monitor or TV. Modern displays often have on-screen menus or remote controls to switch between inputs.
- Direct HDMI Connection: Whenever possible, connect the HDMI cable directly from the source device to the display. Using adapters or extenders may introduce additional points of failure or signal degradation.
- Power On Both Devices: Make sure both your source device and the monitor/TV are powered on and in proper working condition before connecting the HDMI cable. This ensures that the handshake and signal negotiation between the devices occur correctly.
- Proper Configuration: Check that both the source device and the display are configured to accept HDMI input. This can involve adjusting settings on the source device (e.g., resolution, refresh rate) and selecting the HDMI input source on the display.
Recognizing Damages in HDMI Cables
Visual inspection is key to identifying damages in HDMI cables. Look for frayed or damaged cable ends, exposed wires, or bent connectors. Bent or broken pins in the HDMI connector can cause color problems. Check for physical kinks, cuts, or tears in the cable jacket. Consider replacing damaged HDMI cables to resolve color issues.
Signs of a Frayed or Damaged HDMI Cable
Intermittent or various display issues, along with audio problems, can indeed be indicative of a damaged or frayed HDMI cable. Here’s more detail on these common signs of HDMI cable damage:
- Intermittent Display Issues: A damaged HDMI cable can result in an intermittent display, where the video signal occasionally cuts in and out. This can manifest as flickering, a flashing screen, or temporary blackouts.
- Color Artifacts: Damaged cables may not transmit data accurately, leading to color artifacts or incorrect color representation on the display. This can include color distortions, odd tints, or color shifts.
- Freezing or Cutting Out: A frayed or damaged HDMI cable can cause the image to freeze or cut out completely. This can be especially frustrating during video playback or gaming.
- Poor Audio Quality or No Audio: HDMI cables transmit both video and audio signals. If the cable is damaged, it can result in poor audio quality, including static, crackling, or complete loss of audio. In some cases, there may be no audio output at all.
- Test with Another Device: To confirm if the HDMI cable is the issue, connect the suspect HDMI cable to another compatible device (e.g., another TV, monitor, or computer) to see if the issue persists. If you encounter the same problems on the new device, it’s likely the cable is the culprit.
How Different HDMI Ports May Affect Color?
Different HDMI ports on TVs or monitors can have varying capabilities, such as supporting different resolutions, refresh rates, or specific color spaces. Using a port with limited capabilities might lead to color problems. Experimenting with different HDMI ports and consulting the manual can help troubleshoot these issues.
Experimenting with Different HDMI Ports on Your TV/Monitor
If you’re experiencing a color problem with your HDMI cable, try experimenting with different HDMI ports on your TV or monitor.
- Connect the cable to a different port to see if the issue persists or improves.
- Some ports may have better compatibility with certain devices, potentially resolving the color problem.
- Don’t forget to adjust the source device settings to match the new HDMI port.
What Role Does the RGB Setting Play in HDMI Color Quality?
The RGB setting plays a crucial role in determining color quality on HDMI. By adjusting the RGB settings, you can improve color accuracy and vibrancy. Different devices may have varying RGB settings, affecting color output. Properly configuring these settings enhances overall color quality.
How to Resolve the Color Problem by Adjusting RGB Settings?
To resolve the color problem with your HDMI cable, you can;
- Adjust the RGB settings on your source device or TV.
- Access the display settings and fine-tune the individual red, green, and blue channels to achieve the desired color balance.
- Experiment with different settings and consult the user manual for specific instructions.
Conclusion
In conclusion, when it comes to HDMI cable color problems, there are a few quick fixes you can try. Firstly, ensure that the HDMI cables are securely plugged in at both ends, as loose connections can cause color issues. Additionally, be aware of any damages in the cables, such as fraying or breakage, as this can also affect the color quality.
If you’re experiencing color problems, try experimenting with different HDMI ports on your TV or monitor to see if that resolves the issue. Lastly, adjusting the RGB settings can also help in resolving color problems. By following these quick fixes, you can ensure a better viewing experience and enjoy vibrant and accurate colors on your screen.