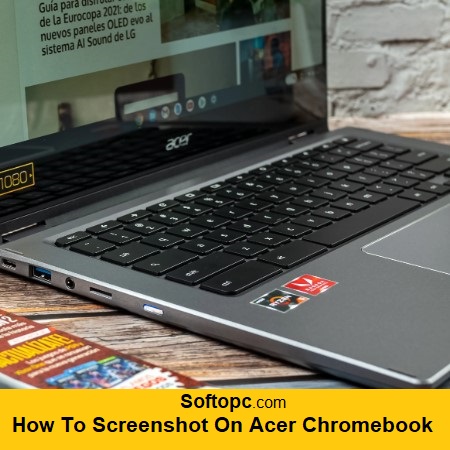
Learn how to screenshot on Acer Chromebook with our simplified guide. Capture your screen effortlessly using step-by-step instructions.
Are you struggling to figure out how to take screenshots on your Acer Chromebook? Don’t worry, we’ve got you covered! In this blog post, we will provide you with a simplified guide on how to take screenshots on your Acer Chromebook.
From understanding what a Chromebook screenshot is to learning different methods for capturing your screen, we will walk you through each step. Whether you want to take a full screenshot, do a print screen, or capture a partial screen, we will cover it all. We will also discuss how to access your screenshots and answer some frequently asked questions. By the end of this blog, you’ll be a pro at taking screenshots on your Acer Chromebook!
What is a Chromebook Screenshot?
A Chromebook screenshot is a digital image of the current screen on your Acer Chromebook. It lets you capture and save a snapshot of anything displayed, such as web pages or documents. You can take a screenshot easily using keyboard shortcuts or the built-in tool. After capturing, the screenshot can be saved as an image file or copied for later use.
How to Take a Full Screenshot on Acer Chromebook
To take a full screenshot on your Acer Chromebook, you can use a simple keyboard shortcut. By pressing the “Ctrl” key and the “Window Switcher” key at the same time, you can capture the entire screen. The screenshot will be saved in the “Downloads” folder by default.
If you prefer to capture a specific area of the screen, you can use the shortcut “Ctrl + Shift + Window Switcher”. To copy the screenshot to the clipboard instead of saving it, use the shortcut “Ctrl + Shift + Ctrl Switcher”. Remember that you can edit or crop the screenshot using image editing software or Chromebook’s built-in photo editor.
How to do Print Screen on a Chromebook
Capturing a screenshot on an Acer Chromebook is a breeze. To capture the entire screen, simply press the “Ctrl” and “Switch Window” keys together. If you only need a specific area, press the “Ctrl”, “Shift”, and “Switch Window” keys, then select the desired portion of your screen.
Once done, the screenshot will be saved in the Downloads folder or can be saved, copied, or shared using the notification. You can further enhance the screenshot using various editing tools or Chromebook’s built-in photo editor. It’s as easy as that!
How a Chromebook lets you take screenshots without a shortcut
Chromebooks have simplified the process of taking screenshots, making it possible even without a dedicated shortcut. With the built-in “Capture” tool, you can effortlessly capture full-screen, and partial screenshots, and even record videos of your screen. Accessing Capture is quick and easy – just click on the clock in the bottom-right corner of the screen and select “Capture.”
After capturing your desired screenshot or video, you have the option to save it to your device or share it directly. This user-friendly feature removes the hassle of memorizing keyboard shortcuts, making screenshotting on a Chromebook a smooth and convenient experience.
How to take a screenshot on a Chromebook tablet
To capture a screenshot on your Chromebook tablet, you can follow these simple steps. Press the power button and volume down button simultaneously to capture the entire screen. If you only want to capture a specific area, press Shift + Ctrl + the window switcher key and drag the cursor over the desired area.
The screenshots will be automatically saved in the “Downloads” folder, which you can access through the notification panel. From there, you can easily share your screenshots via email or social media platforms. If you want to add some personal touches to your screenshots, you can use the stylus pen to draw or annotate them before saving or sharing them.
Partial screen capture in Chromebook’s tablet mode using a stylus
Capture a specific area of your screen on an Acer Chromebook in tablet mode with these simple steps. Start by enabling tablet mode on your Chromebook and navigate to the desired screen using a stylus or your finger. Press and hold the power button and volume down button together until you see a flash on the screen. Retrieve your captured screenshot from the “Downloads” folder. From editing to sharing, leverage the full potential of your Acer Chromebook while in tablet mode.
How to access screenshots on Chrome OS
To easily access screenshots on Chrome OS, there are a few simple steps you can follow. Firstly, you can use the keyboard shortcut available on your Acer Chromebook to capture a screenshot. Once captured, your screenshot can be easily accessed through the Files app or the Downloads folder. Moreover, you have the flexibility to customize your screenshot settings right from the Chrome OS settings menu. This allows you to personalize your screenshot preferences and make the most of your Chromebook’s capabilities.
Whether you want to share your screenshots or edit them using various apps and tools, Chrome OS offers a seamless experience. In case you encounter any issues with capturing or accessing screenshots, there are troubleshooting tips available to help you navigate through them smoothly.
LightShot
LightShot is an incredibly useful screenshot tool for Acer Chromebook users. It seamlessly integrates with your Chromebook, providing a hassle-free way to capture screenshots. Whether you want to capture the entire screen or just a specific area, LightShot has you covered.
Once you’ve taken a screenshot, you can easily edit it by adding annotations or cropping the image. Saving and sharing your screenshots is a breeze with LightShot’s intuitive interface. It’s a reliable tool that makes capturing and managing screenshots on your Acer Chromebook a breeze.
Awesome Screenshot
Awesome Screenshot is a useful built-in screenshot tool available on Chrome OS, specifically designed for Acer Chromebooks. To capture a screenshot on your Acer Chromebook, simply press the “Ctrl” and “Show Windows” keys at the same time. This convenient shortcut allows you to quickly take screenshots without the need for external software or complex steps. Your screenshot will automatically be saved in the “Downloads” folder, making it easily accessible for further use.
If you require additional screenshot functionalities, you can enhance your Chromebook’s capabilities by installing the Awesome Screenshot extension from the Chrome Web Store. With this extension, you can annotate, crop, and share your screenshots directly from your Chromebook, providing a seamless and efficient screenshot experience.
Flamory
Flamory is a helpful screenshot and bookmarking tool that expands your screenshot capabilities on an Acer Chromebook. With Flamory, you can conveniently capture screenshots on your Chrome OS device using the “Ctrl + Shift + S” keyboard shortcut. These screenshots are then automatically saved and organized in a library for easy access and management.
Flamory also offers a user-friendly interface that allows you to annotate and edit your screenshots, enabling you to emphasize important details with text, arrows, or highlights. Enhance your screenshot experience with Flamory on your Acer Chromebook, providing you with a reliable and efficient way to capture and customize your visuals.
Frequently asked questions
Does a Chromebook have a screenshot shortcut?
Yes, Chromebooks have a screenshot shortcut. To capture the full screen, press Ctrl + Show Windows keys. For a specific area, use Shift + Ctrl + Show Windows keys and the crosshair cursor. Screenshots are saved in the “Downloads” folder or can be found in the “Files” app under “My Files.”
What is the best screen capture tool for Chromebooks?
The built-in screen capture tool on Chromebooks is the most convenient option, allowing you to capture the entire screen or a specific area. However, if you’re looking for more features like annotations and image editing, Awesome Screenshot is a popular choice. Nimbus Screenshot is another highly recommended tool that offers options for capturing the entire page, selected area, or even recording videos.
Conclusion
In conclusion, taking screenshots on your Acer Chromebook is a simple and straightforward process. Whether you want to capture the entire screen or just a specific area, there are different methods available to suit your needs. Additionally, you can also explore various screenshot tools like LightShot, Awesome Screenshot, and Flamory to enhance your screenshot-taking experience on Chromebooks. So next time you need to capture something important on your Chromebook, refer back to our simplified guide for easy reference.